Compile nim on Android
stisa, Dec 18, 2016Nim is a programming language that I’ve been playing with for the last few months.
Unfortunately, my pc is stuck in the limbo of warranty for the next month or so, and I found myself without any way to code.
Or so I thought, until I remembered the Android phone in my pocket and, with a bit of effort, I got Nim to compile on it!
In this post I will try to list and explain the steps I took to get nim to compile on my phone. As the Android ecosystem
is very diverse, I can’t guarantee that these steps will work nor that your phone won’t explode/implode or otherwise
malfunction, but root is not necessary so the worst that could happen should be that you waste 100 MB or so for the terminal emulator.
update2: some more discussion on this on nim forums and github
update: I found out that glob is available as a package on termux, so here are some tentative instructions :
Install glob
apt install libandroid-glob
apt install libandroid-glob-dev
Link glob: in compiler/nim.cfg
define:android
passL:"/data/data/com.termux/files/usr/lib/libandroid-glob.so"
Fix compilation
in lib/posix/posix.nim
- line 1618:
when not defined(macosx) and not defined(android): - line 278:
when defined(macosx) or defined(android):
in lib/pure/osproc.nim
bin/sh -> sh
Done!
Prereqs
- a recent Android phone. I was succesfull in building nim on a Honor 8 running Android 6.0, with
a 64 bit ARM cpu and no root. - a terminal emulator called Termux that we will use to run commands.
Setting up termux
Grab a copy of termux, then open it and run apt-get update && apt-get upgrade.
Then run termux-setup-storage, this will create a storage folder with symlinks to actual
folders in your phone filesystem.
Now run apt-get install clang to get a c compiler ( gcc used to be supported, but that’s no
longer the case ) and optionally apt-get install git.
Tip: the standard android keyboard is a pain to use in the terminal, if you do not have a bluetooth
keyboard have a look at hacker's keyboard in the play store.
Obtaining nim
We are going to more or less follow instructions from nim website.
First of all, download the c sources
Then open termux and cd to your download dir, eg cd storage/downloads and run tar xf <nimcsources.tar.xz>.
Now that we have our sources, lets move on to patching and compiling it.
Patching nim
This parts differs based on your device, I can only show how I did it.
The simplest way to get started is trying to build nim, so inside the folder you just extracted run sh build.sh.
It will fail, but we just need to know which folder it’s trying to use.
The only phone I got to work is running android 6.0 with a 64bit cpu.
If you are on a recent device, with a 64bit cpu, it’s going to fail with unknown cpu aarch64.
So we need to add aarch64 to build.sh:
at the top there’s a big case statement, near the end there’s arm64, add *aarch64* to the condition above it.
While we are here, change cc=gcc to cc=clang.
Now give sh build.sh another try.
Didn’t work heh?
Inside the folder c_sources there are various folder named <number>_<number>.
Look for the folder that the build we attempted earlier used, in my case 2_10.
We need to add glob, as android is missing it for some reason:
Copy glob.h, glob.c (found these on this google group to 2_10, then change 2_10/compiler_options.c to use " instead of < for including glob.h
and in 2_10/stdlib_osproc.c change /bin/sh to sh.
Now compile glob: clang -c glob.c -o glob.o
Go back to build.shand add c_code/2_10/glob.o to the linker (look for the block of lines ending with .o and starting with c_source/2_10)
Lastly, in lib/pure/osproc.nim change bin/sh to sh
Compiling and setting up nim
Copy your nim source folder to termux storage: cp <storage/downloads/nimcsources> <.>
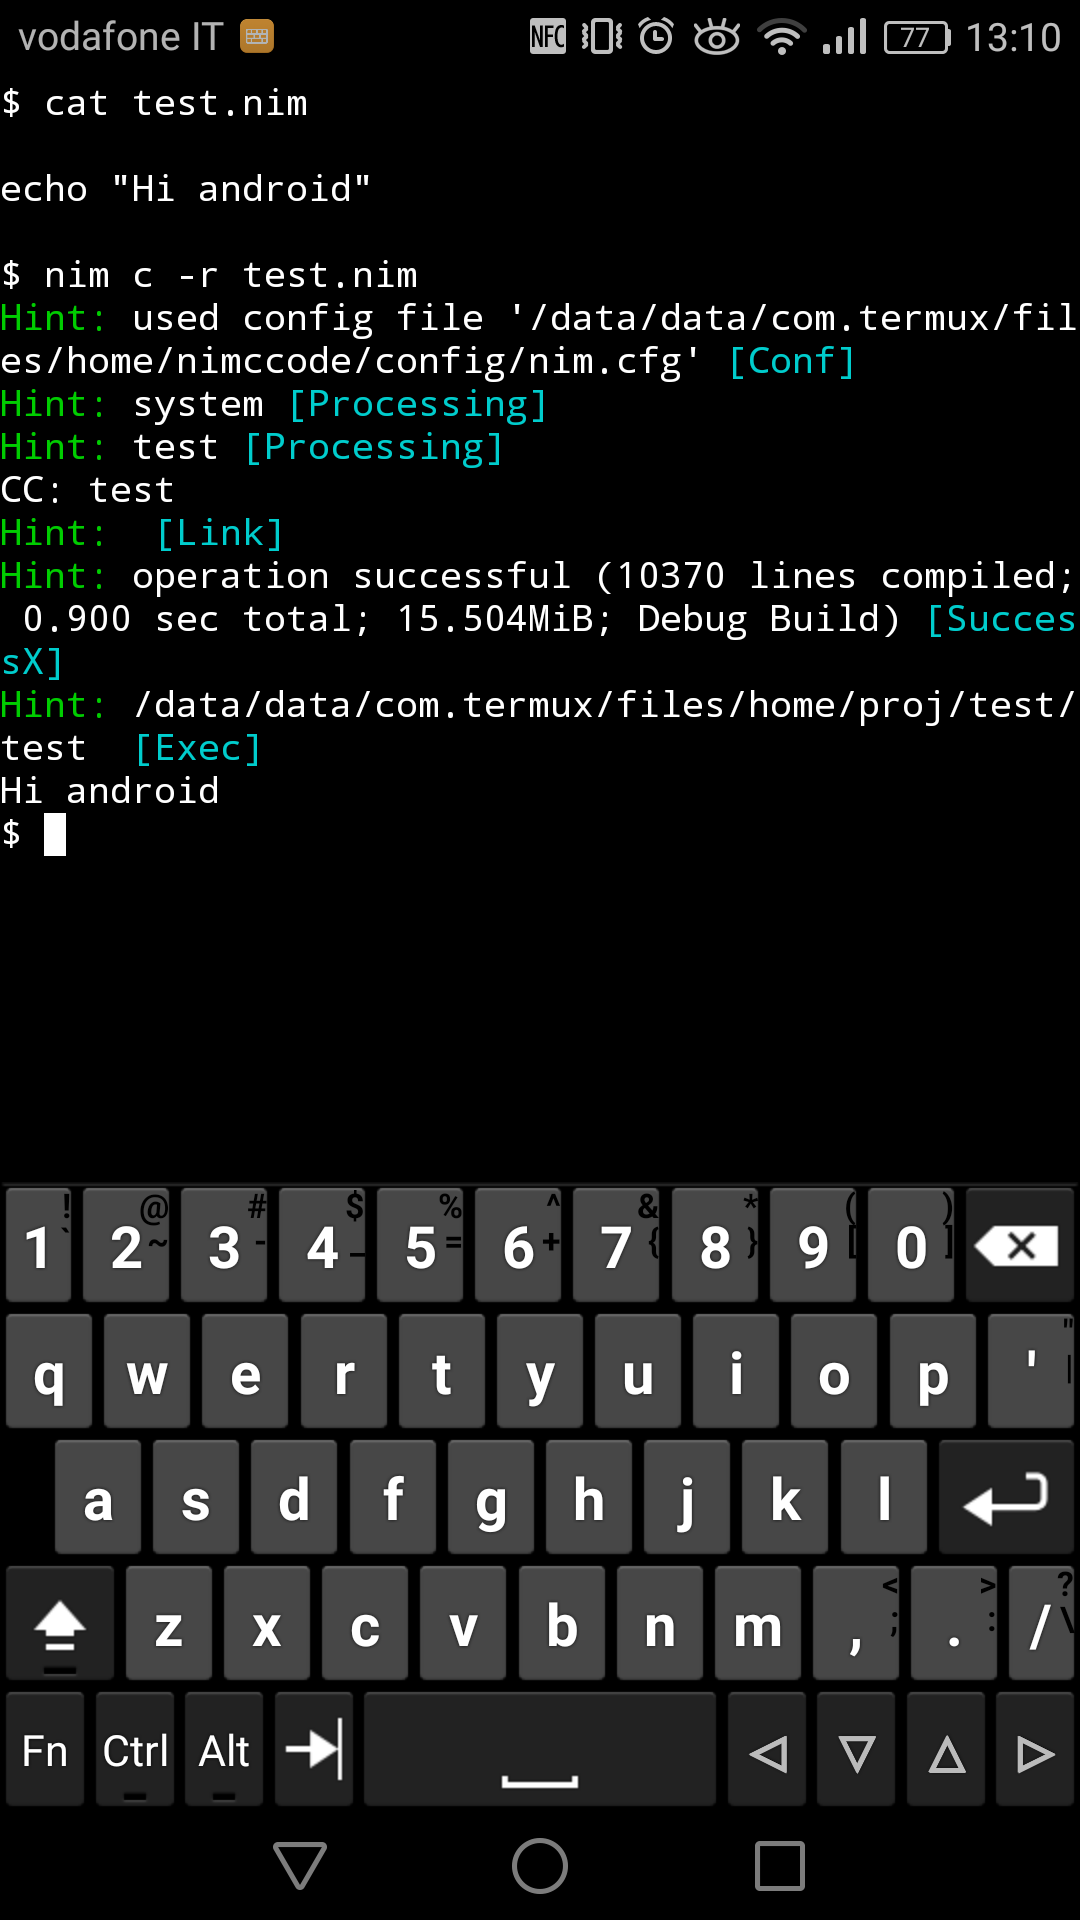
Now enter the folder and run sh build.sh. This will take a while, at the end of compilation you should see SUCCESS.
Inside nimcsources/bin you should find your nim compiler.
Now we need to set clang as compiler: inside your nim folder, in config/nim.cfg set CC=clang instead of CC=gcc
update: we need to set up glob so it is linked correctly:
copy glob.h to /usr/include ( you can find this folder going up with cd .. , it shouldbe on the same level as home ) and glob.o to /usr/lib , then in config/nim.cfg search for clang.options.linker and add /data/data/com.termux/files/usr/lib/glob.o to it.
The last thing we need to do is setting ./bin/nim to executable: cd bin && chmod +x nim
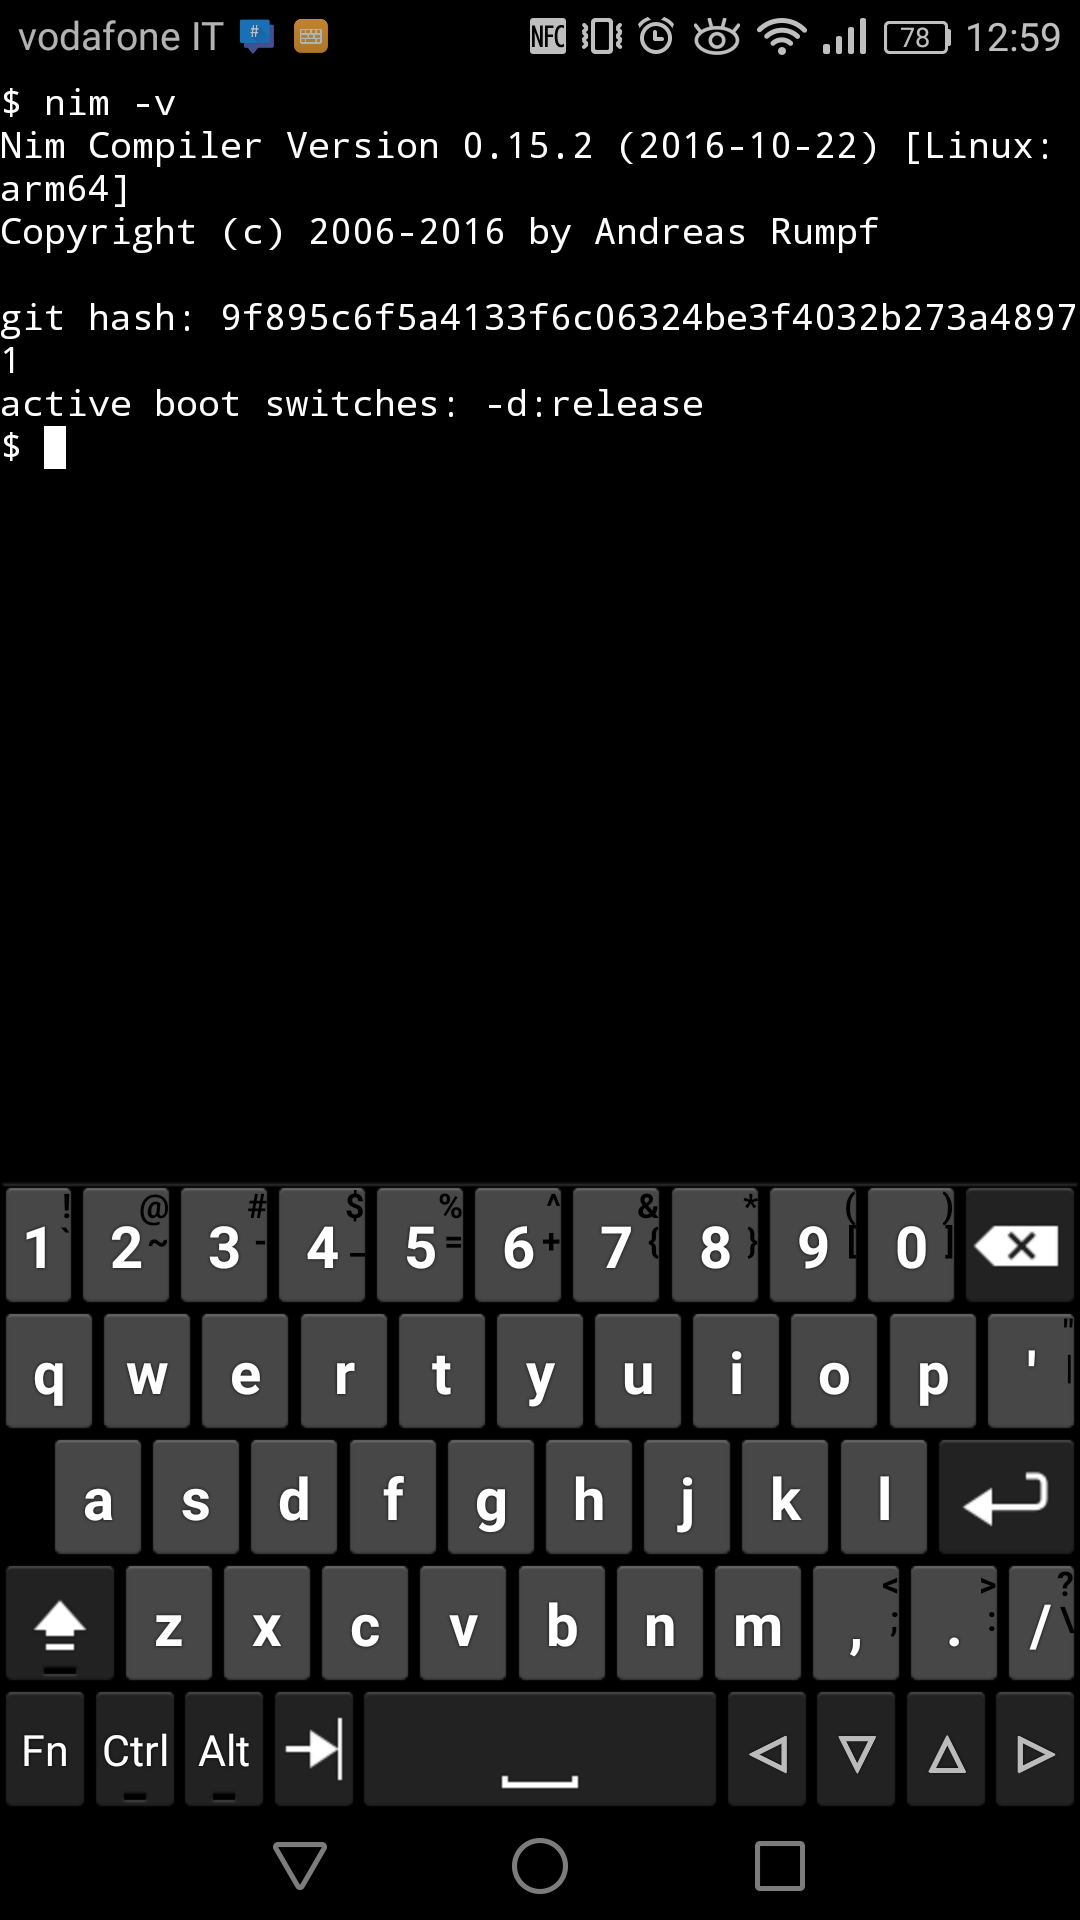
And finally, ./nim -v
Add nim to path
In usr/etc/profile add export PATH=$PATH:/data/data/com.termux/files/home/nimcsource/bin
Exit and reopen termux and nim -v should work.
Todo>fix glob: issetugid and size_t
Tags: